In the good old days of the web :) Can you remember? It was enough to upload your files (PHP, HTML, JavaScript and CSS) to the server and all was good. But nowadays there are so many things to keep in mind. Upload the code (maybe via GIT), install the vendors (maybe via composer) and update your database. In more complex use-cases you also have to clear some caches (maybe varnish) or make some backups (maybe nanbando).
If you also have such an application which needs periodic updates then, I am completely sure, you can also remind that you have forgotten something.
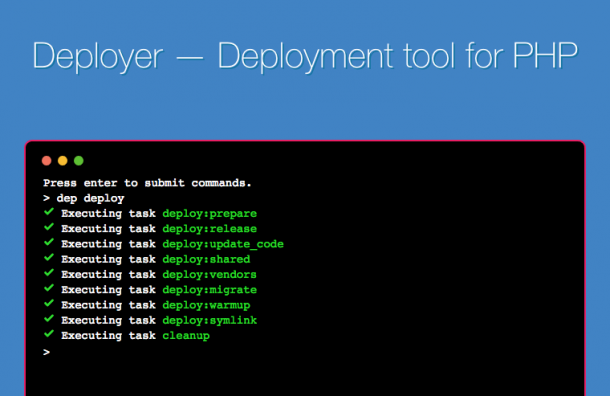
This is where Deployer enters the scene.
Deployer is a simple deployment tool for PHP. It provides predefined scripts which allow you to deploy Symfony or any other PHP application. I want you to show how I use Deployer to update my Sulu Homepage.
Features
Deployer provides a way to create deployment scripts by using modular blocks of code, called recipes.
The most important features are rollbacks to previous releases and atomic deployments which use symlinks to prepare the code and replace the previous release when it was successful. This mechanism allows deployments with zero downtime. The tool uses GIT to deploy the code and an open SSH connection to call commands on the server.
Getting started
You can install Deployer globally by downloading the PHAR file from the homepage. But alternatively, you can use composer to install it. This allows you to manage the dependency in your "composer.json" file and all your teammates automatically using the same version.
composer require deployer/deployer:^5.0 --dev
bin/dep init
The second command initializes the deployment script ("deploy.php") in the root directory of your project. Select "Symfony" as the project type.
<?php
namespace Deployer;

require 'recipe/symfony.php';

// Configuration

set('repository', 'git@example.com:asapo/website.git');
set('git_tty', true); // [Optional] Allocate tty for git on first deployment
add('shared_files', []);
add('shared_dirs', []);
add('writable_dirs', []);


// Hosts

host('project.com')
    ->stage('production')
    ->set('deploy_path', '/var/www/project.com');

host('beta.project.com')
    ->stage('beta')
    ->set('deploy_path', '/var/www/project.com');


// Tasks

desc('Restart PHP-FPM service');
task('php-fpm:restart', function () {
    // The user must have rights for restart service
    // /etc/sudoers: username ALL=NOPASSWD:/bin/systemctl restart php-fpm.service
    run('sudo systemctl restart php-fpm.service');
});
after('deploy:symlink', 'php-fpm:restart');

// [Optional] if deploy fails automatically unlock.
after('deploy:failed', 'deploy:unlock');

// Migrate database before symlink new release.

before('deploy:symlink', 'database:migrate');
This basic deploy script already contains most of the code which we have to write. So let's start to adopt it.
First, we have to configure the server where we want to deploy the project. In this case, my server "asapo.at" and the path where it should be deployed "/var/www/asapo.at".
diff --git a/deploy.php b/deploy.php
index e3e44f5..4d20c69 100644
--- a/deploy.php
+++ b/deploy.php
@@ -14,13 +14,9 @@ add('writable_dirs', []);

 // Hosts

-host('project.com')
+host('asapo.at')
     ->stage('production')
-    ->set('deploy_path', '/var/www/project.com');
-
-host('beta.project.com')
-    ->stage('beta')
-    ->set('deploy_path', '/var/www/project.com');
+    ->set('deploy_path', '/var/www/asapo.at');


 // Tasks
In the second step we will remove the "php-fpm:restart" task. This task is used to reset the APCu cache on your server after the deployment. On my server, I use Apache with fcgi. So we don't need it in my case.
diff --git a/deploy.php b/deploy.php
index e6a142f..a6e4f2d 100644
--- a/deploy.php
+++ b/deploy.php
@@ -18,16 +18,6 @@ host('asapo.at')
     ->stage('production')
     ->set('deploy_path', '/var/www/asapo.at');

-// Tasks
-
-desc('Restart PHP-FPM service');
-task('php-fpm:restart', function () {
-    // The user must have rights for restart service
-    // /etc/sudoers: username ALL=NOPASSWD:/bin/systemctl restart php-fpm.service
-    run('sudo systemctl restart php-fpm.service');
-});
-after('deploy:symlink', 'php-fpm:restart');
-
 // [Optional] if deploy fails automatically unlock.
 after('deploy:failed', 'deploy:unlock');
Until now we can use the deployment script for any simple Symfony application but now we will enter the Sulu specific part.
We can define shared directories/files and writable directories. Additionally, we specify the path to PHP, composer and tell Symfony that we want to use the "bin/websiteconsole" to call the Symfony commands. The not standardized console file is influenced by the multi-kernel architecture of Sulu.
diff --git a/deploy.php b/deploy.php
index a6e4f2d..7f8b86c 100644
--- a/deploy.php
+++ b/deploy.php
@@ -7,10 +7,18 @@ require 'recipe/symfony.php';

 set('repository', 'git@example.com:asapo/website.git');
 set('git_tty', true); // [Optional] Allocate tty for git on first deployment
-add('shared_files', []);
-add('shared_dirs', []);
-add('writable_dirs', []);

+set('bin/php', '/path/to/php');
+set('bin/composer', '{{bin/php}} /path/to/composer');
+set('bin/console', '{{release_path}}/bin/websiteconsole');
+
+add('shared_files', ['app/config/parameters.yml']);
+add('shared_dirs', ['var/indexes', 'var/sessions', 'var/sitemaps', 'var/uploads', 'web/uploads', 'var/cache']);
+add('writable_dirs', ['var/indexes', 'var/sessions', 'var/sitemaps', 'var/uploads', 'web/uploads', 'var/cache', 'var/cache']);
+
+set('http_user', 'www-data');
+set('http_group', 'www-data');
+set('writable_mode', 'chown');

 // Hosts
Sulu will write into the directories beneath "var" the directory and Deployer will make these directories writable for the "www-data" user by using "chown".
The project also contains directories which should be shared over the releases. Deployer provides a way to configure "shared" directories and files. These will be created in a separated directory outside the release folder and linked into it when the deployment was successful.
bin/dep deploy production
✔ Executing task deploy:prepare
✔ Executing task deploy:lock
✔ Executing task deploy:release
➤ Executing task deploy:update_code
Counting objects: 626, done.
Delta compression using up to 2 threads.
Compressing objects: 100% (331/331), done.
Writing objects: 100% (626/626), done.
Total 626 (delta 279), reused 626 (delta 279)
Connection to asapo.at closed.
✔ Ok
✔ Executing task deploy:clear_paths
✔ Executing task deploy:create_cache_dir
✔ Executing task deploy:shared
✔ Executing task deploy:assets
✔ Executing task deploy:vendors
✔ Executing task deploy:assets:install
✔ Executing task deploy:assetic:dump
✔ Executing task deploy:cache:warmup
✔ Executing task deploy:writable
✔ Executing task database:migrate
✔ Executing task deploy:symlink
✔ Executing task deploy:unlock
✔ Executing task cleanup
✔ Executing task success
Successfully deployed!
While the deploy is running the tool creates following directories inside "/var/www/asapo.at":
- ".dep": contains metadata for releases
- "releases": contains directories for each release (1, 2, 3 ...)
- "current": symlink to current release
- "shared": contains shared directories and files
- "release": symlink to new release during process (will be removed at the end)
All you have to do now is to create the "/var/www/asapo.at/shared/app/config/parameters.yml" file with your server specific configuration and create a VHost file for your prefered webserver (Apache or Nginx) which uses "/var/www/asapo.at/current/web" as root dir.
Conclusion
Deployer is a simple but very powerful tool. The really basic deployment script we implemented in the last few minutes is able to fulfill a complete deployment within a minute. It is extendible and maintainable. And the best thing is that you cannot forget something.
Be sure to give it a try!